SSL certificate ACTIVE  

BUYING  THE   TRACK  FOR  YOUR  LAYOUT

After selecting the gauge to suit your space the next thing is to choose the type of track. There are two types of track; setrack and flexible track.
The points are only available with isolated ‘frog’ which is explained lower down this page.
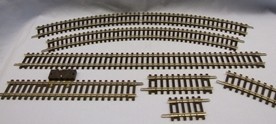
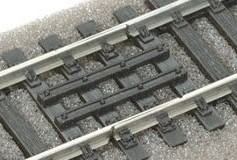
Setrack comes in pieces, rather like a jigsaw puzzle where the straight tracks are standard lengths and the curve track comes already curved with different radius and again in standard lengths. The points come in standard sizes that match the straights. 
The points in the setrack are only available with isolated ‘frog’ (which is explained lower down this page) and are available from both Hornby and Peco from any good model shop. No additional items are required other than track pins.
 
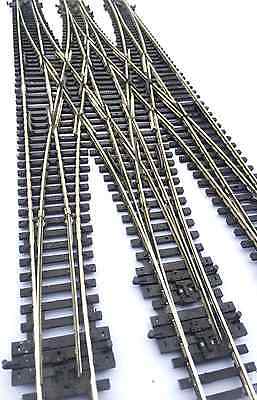
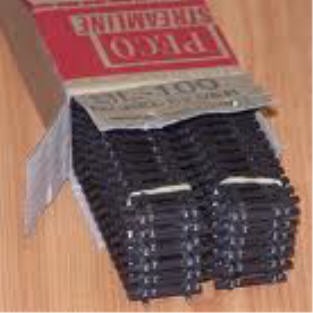
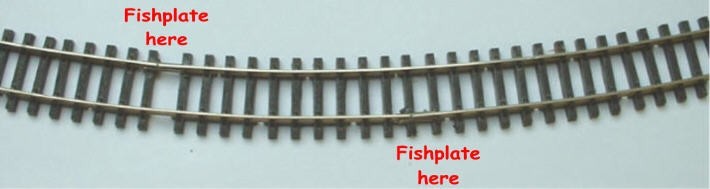
Flexible track comes in 3 foot lengths and can be cut to form any radius curves so if space is available a much smoother curve can be produced which looks very good particularly if the curves blend well into the straight sections. The points come in much more shapes and sizes with a choice of three lengths in both right and left points together with even curved points in each direction.
One last thing to point out is that flexible track is available in standard or fine scale. Standard track (Peco code 100 in 00 gauge & Peco code 300 in N gauge) has a rail profile larger than fine scale with standard being the most popular.  It is not recommended to mix standard and fine scale because the dimensions do not match up.
Unlike setrack Flexible track points come in three difference radius turnouts as well as crossovers and curved points.  Each are available with isolated frogs (as setrack) and as ‘live’ frog.  The insulated and live frogs will be explained later down the page.   
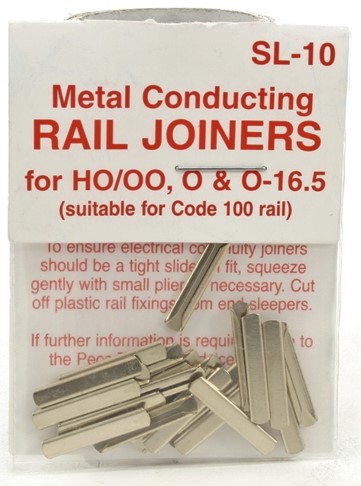
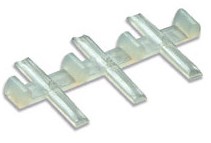
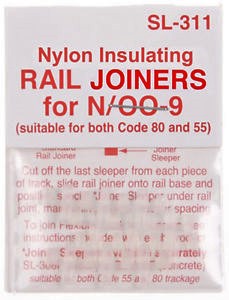
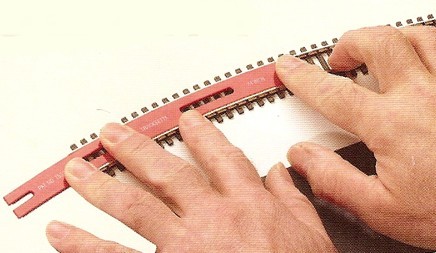
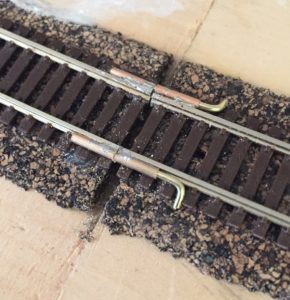
As this type of track needs to be cut to length ‘fishplates’ (track joiners) will be required but the result is wonderful.
Setrack’ takes the form similar to a jigsaw where the pieces of track are available in straight lengths in several lengths. The curves are available in four radius and several lengths making it easy to create curves to suit your track layout design.
All pieces come complete with fishplate so just have a ‘push fit’ to assemble.
‘Trackset’ track is available from both Hornby and Peco.
Peco flexible track in most gauges comes in 36 inch lengths and although sold in single lengths it is supplied to retailer in boxes of 25 and most model shops will give discount when a customer buys a full box.
Do remember that flexible track (unlike setrack) can be made into any shape, straight or curved and cut to any length so a full box is soon used. 
These lengths after being cut to the required length will need ‘fishplates’ to join together.
The above lengths of track are joined together with metal clips called ‘fishplates’ which are available in bags containing 24. Remember you also need fishplates to join the flexible track to pointwork so always have a few bag available.
They are also available in plastic for isolated joints. 
Metal Fishplate
Platic Fishplate

LAYING  THE  TRACK

Lay out the track on the baseboard following the plan you have made and check that it is possible paying attention to curves and clearances. The track can be laid directly on top of the baseboard but many people prefer to raise the track by laying the following materials between the track and the baseboard.
      1. Foam strip  (Peco or Hornby)
      2. Rubber strip from Tracklay mail order
      3. Cork (Gaugemaster)
      4. Balsa wood 
All above should be available from any good model shop
Where a curve runs into a straight keep the shape smooth which will ensure the trains run and looks correct; and not derail. The Tracksetta template shown above is positioned between the running rails and slide round the curve as you advance; pining as you go through the centre slots; changing the radius to a larger radius as you reach the straight.
These are available in both ‘OO’ and ‘N’ gauges.  When laying a large amount of track and wanting to make the train run smooth best get yourself a full set including the straight because remember the track is flexible and will not remain straight unless guided by your tracksetta’s. A long steel rule would also be a good investment.
It is important to check the track as you progress round your layout looking for any mis-alignment of rails as they enter the fishplate by just running your finger over the joint.
When joining flexi-track on a curve cut the track as shown on left to ensure smooth running of trains.
If either rails has not fitted into the fishplate it would be felt like a step. To correct pull apart and fit together again.  This alignment of fishplates also applies to setrack.
Track must be flat to ensure smooth running.
As both full size (real railways) and model railway scale track rails are made of metal and will expands and contracts as the temperature changes.
It is a problem, perticularly if your layout is in the attic or out-building where the temperatures will range more.
Althought there are gaps at the fishplates it is a good idea to fit expansion joints as Railtrack do allowing the rail to slide alongside each other as shown below.
This is the full size version as fitted by Railtrack
Note that the direction of travel is from left to right
The black is grease to ensure the rails slide smoothly.
This is the Peco Expansion joint which is currently only available in ’00’ gauge to match code 100 track.
Part code SL-44


Direction of travel is from left to right

CLEANING  TRACK  TO  ENSURE  SMOOTH  RUNNING  TRAINS

Many thanks and acknowledgement to the makers of the following videos

A tip from Model Railway Exhibitors

After cleaning the track with a track rubber and clearing up track area with a vacuum cleaner rub the top and inside edge of track with a ‘Graphite’ stick readly available on the internet (see video on left) which helps the electrical connections between wheels of locos and track resulting in smooth running

Supply must be switched off when carrying out the above operation

When joining boards together where a track is being laid across the gap it is important to get good mechanical and electrical connections.

The boards can have ‘bolts’ joining the boards together and the track can be joined by the method shown on the left with a pin passing through a small piece of brass tube (available from most model shops) soldered to the outside edge of the track.