SSL certificate ACTIVE  

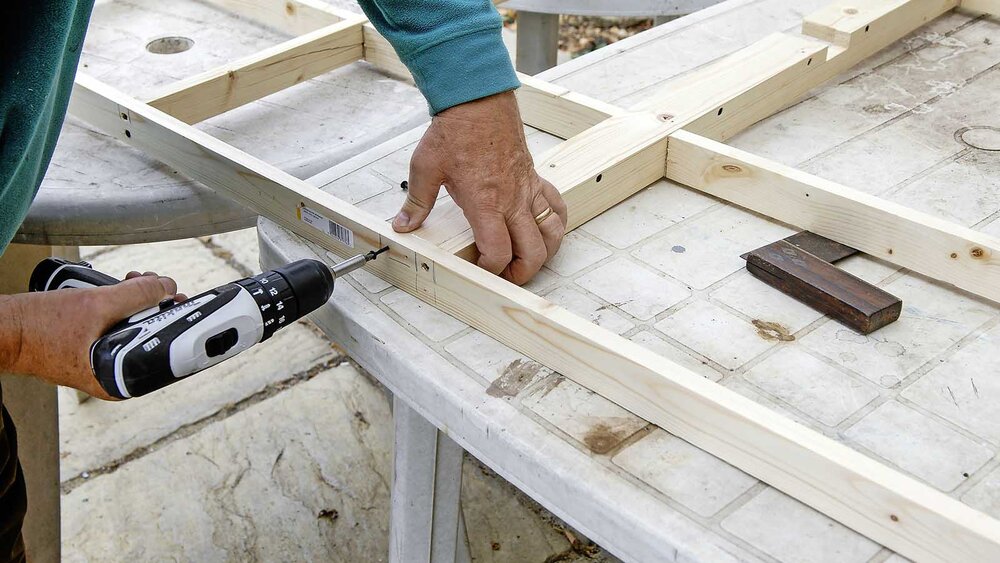
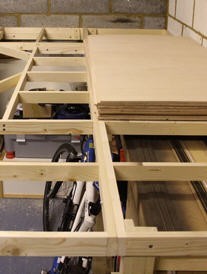
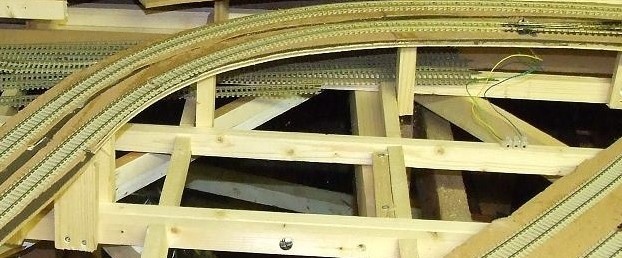
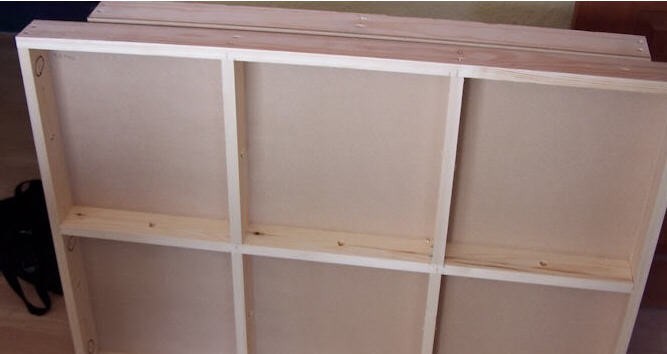
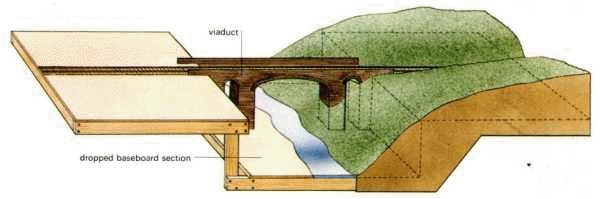
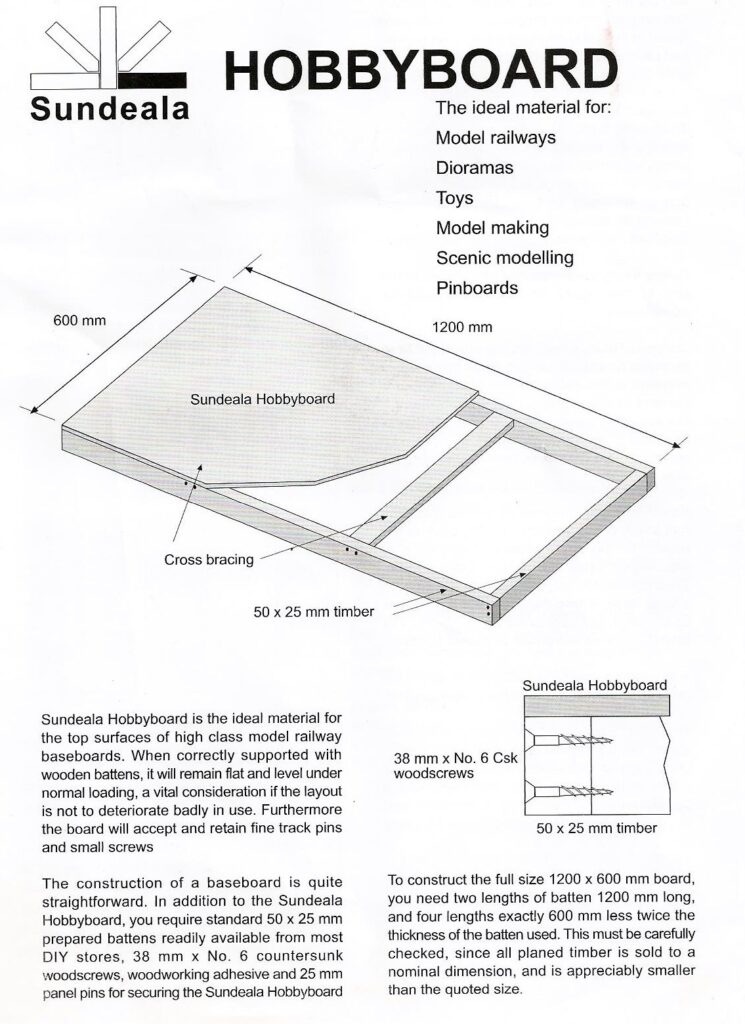
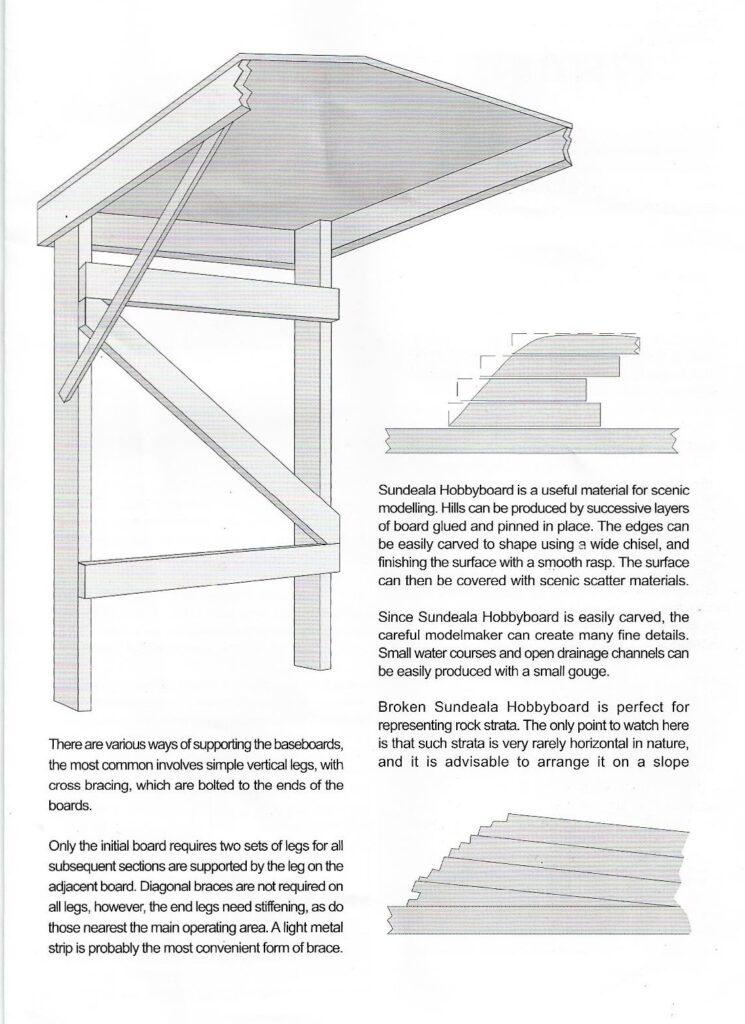
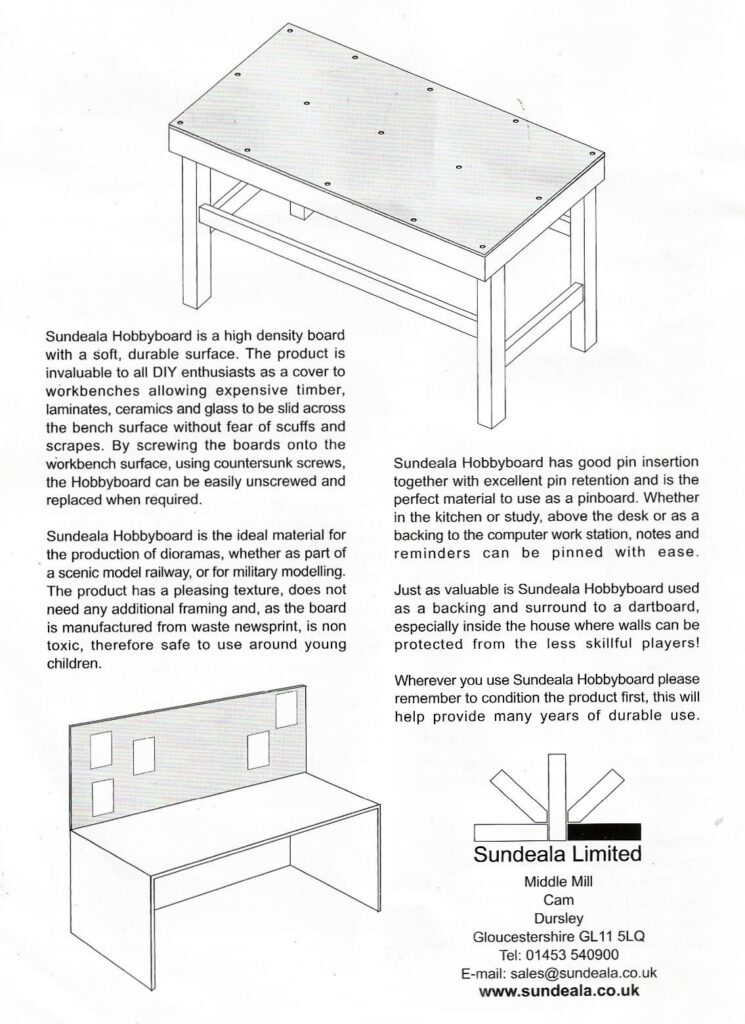
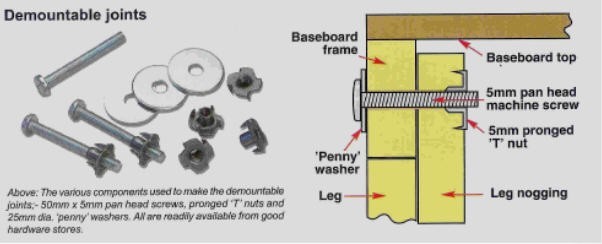
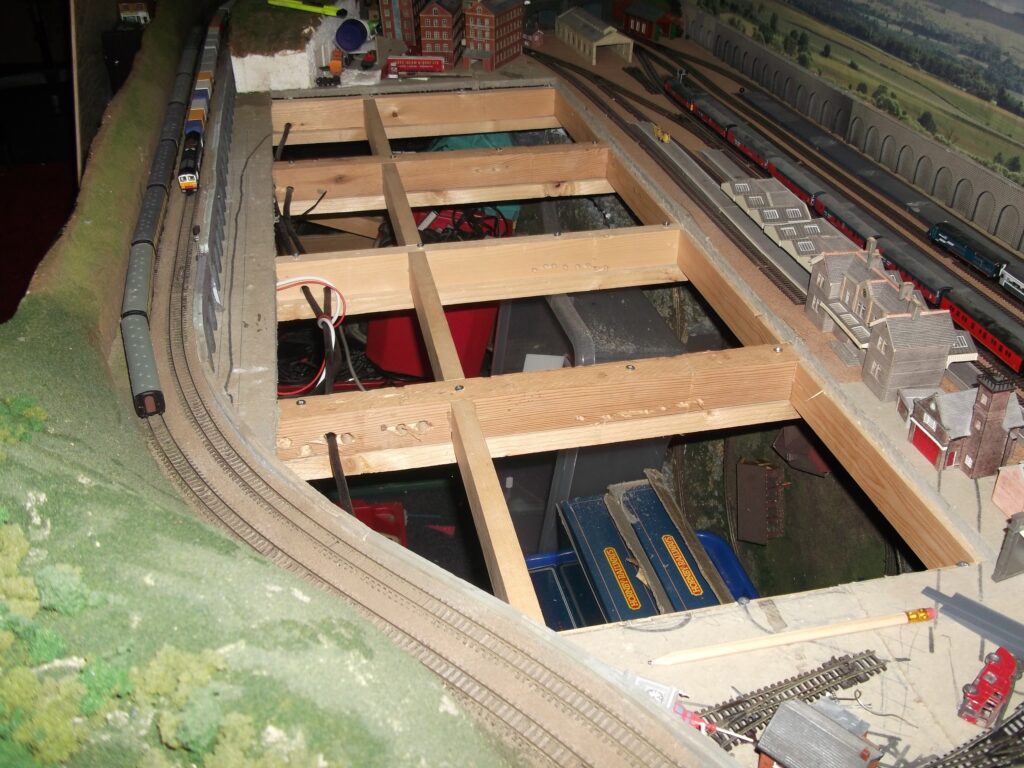
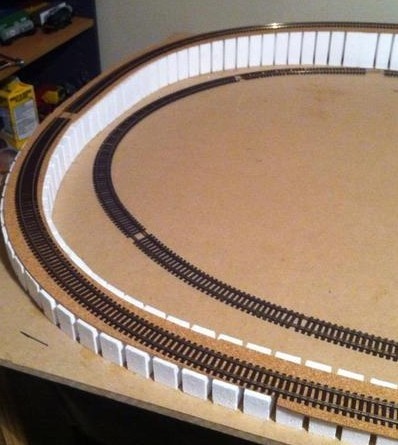
The main structure is built using planed timber around 50mm x 25mm (minimum size) with 75mm x 25mm ideal size edge ways on to give additional strength so the top surface remains flat when weight is added to the top surface.
It’s a good idea to use a spirit level to ensure the top is level remembering train run best on a flat level surface.
The maximum space between the cross members should not be more than 30cm assuming the top material will be a minimum thickness of 6mm (12mm is ideal) ply wood or similar material.
The cross members can be screwed together using around 60mm long CSK steel screws making sure all timbers are lined up to ensure a flat surface.
The picture on the left shows an ‘open frame’ system.
The top surface is best covered with a sheet of ply wood with a minimum thickness of 6mm (12mm is ideal)which makes a strong flat surface ready to start building a railway.
If at this stage you know you will be having any valleys where the ground level will be below the track level then build the lower level now
For a simple recess in the ground leave a piece of ply wood out on the top surface and attach a piece of ply under instead of on top of the timber frame.
As a rough guide the minimum size of board for ’00’ gauge is 4 foot by 8 foot and 2 foot by 4 foot for ‘N’ gauge.     These sizes allow the use of ‘setrack’ curves but if possible try and make the sizes greater than above and use flexable track.
This would be very easy to do if the boards were around the are outside of a room.
 
Metcalfe Card Kit
The final thing to do is cover the plywood top with a fibre material as used for notice boards, insulation boarding, or laminate floor underlay. The advantage of using these materials is:-


  • easy to push track pins in without the need to use a hammer
  • reduces sound when trains are running  
The best material for the top covering is available from builders merchants and some model shops and is known as ‘Sundeala’ or ‘Hobby Board’.
An alternative to the above is covering the wooden top surface with cork sheet around 3mm. thick where the tracks is which will reduce the sound of trains running over it and form a ballast preform ready to receive the loose ballast. 
If using the ‘Sundeala’ shown above I would recommend you lay it on a plywood base sheet with a minimum thickness of 6mm.  (12mm ideal) to form a sandwich to ensure the track surface remains flat and level. Although ‘Sundeala’ is a great surface to lay track on it does need total support. 
One word of warning with ‘Sundeala’. It is basically compressed paper and is subject to absorbing moisture so is not suitable if the location of your layout is in a damp shed or attic because it will expand and loose it’s flatness and could give problems with the trains running. 
If you need to store or transport your railway in sections you will need to ensure the boards align every time so may we recommend the pattern makers dowels shown on left plus coach bolts with wing nuts to close the gap.
When joining base board sections together have a look at the diagram.
Although the bolts will line up the boards it would be good to also use the alinement fittings then the bolts holes could have more clearance.
Ensure at all times that the top level always lines up with the next board while checking the top surfaace with a long spirit level.
To ensure the base board surface is level with the add of a long spirit level being able to adjust the heights is important so build into the legs some kind of adjustment.
An example is on left and other types are also available or you can always use your own design
Finally the complete surface should be painted with a primer coat of paint to seal the surfaces before adding track and senery.
A useful feature is to have a removeable piece of the top surface where you know you will be doing a lot of detailed work on.
This will enable you to take that piece of board to a more comfortable place to add the scenics thus reducing back strain.
See pictures on right

POLYSTYRENE  TRACK  SUPPORTS

Incline/Decline units are tapered ramps
(2% recommended)
Risers are the same height over the full length
(to raise height of track above base board level)

As the baseboard is the ‘foundation’ of your model railway and as building a house is very important here are a few ideas to help you

For those of you who would prefer the baseboard made for them to your dimensions may have a look at the videos above and on the left.
Maybe your not too sure of the finished sizes and would prefer to build it as you go at your pace we hope all the above information is of help.
Most of the materials are available from any good DIY stores or builders merchants and the skills required are well within most DIY people.
We acknowledge and thank PECO; BRM; and BCA for the above videos